

Photo: Carmen Troesser
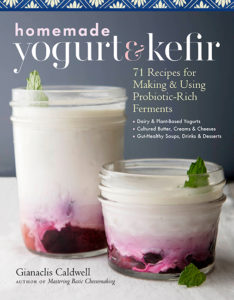
By Gianaclis Caldwell
Making yogurt at home seems to have made a resurgence now that many folks are staying home and honing their culinary skills. The book, Homemade Yogurt & Kefir by Gianaclis Caldwell, will guide you through the process with ease. Here are her words …
If you are interested in improving and maintaining your health while tapping into the gratification that comes from making your own foods, then homemade yogurt is something you must try! Trust me: It’s so simple that even a child can do it. I know because I grew up doing just that.
Homemade yogurt will not only taste better than most store-bought versions, but you can also control what is added to it, leaving out thickeners and other additives. If you like your yogurt super thick and creamy, no problem! Just drain it to whatever consistency you like.
Making yogurt at home also enables you to ensure its freshness and, therefore, keep the probiotic counts high, since they tend to drop off while sitting on the grocery store shelf. Oh, and you can also greatly reduce plastic waste by making your homemade yogurt in glass containers.

Photo: Carmen Troesser
Here is the Classic Yogurt Recipe
What You’ll Need
Little in the way of equipment is needed to successfully make yogurt at home. All you need is a glass or stainless steel container, a thermometer, and a warm place to let it incubate for four to eight hours. This toasty spot can be anything from an electric yogurt maker to the inside of an oven with a pilot light – any spot that can be kept at between 105 degrees F and 115 degrees F.
Ingredients are also easy to come by. You’ll need milk and culture. For the milk, I encourage organic whole milk. It can be pasteurized and homogenized. If you have access to high-quality farm-fresh milk, that’s great, too. Making yogurt includes a step where the milk is heated to over 180 degrees F as a way to capture more of the whey proteins for a thicker, higher-protein yogurt.
If you happen to buy ultrapasteurized milk, it has already been heated quite high, so you can skip the preheat treatment step. For culture, start your first batch with a bit of store-bought yogurt. Ensure that the store-bought yogurt is a long way from its sell-by date and that it contains probiotic cultures.
How To Do It
Pour the milk into a stainless steel pot and place it on the stove over medium-high heat. Skip this step if you are using ultrapasteurized milk. See above for more details.
Stir constantly until the milk comes to a boil. Turn off heat and remove the pot from the stove.
Set the pot in a sink of cool water and stir the milk until it reaches 120 degrees F.
For every quart of milk, use 1 tablespoon of yogurt. Place the yogurt in a small bowl and pour in enough warm milk to cover it. Whisk or stir until the yogurt has thinned out and become smooth.
Pour the thinned-out yogurt into the rest of the warm milk. Either pour the entire contents into a jar, or jars, or use the same pot to incubate the yogurt.
Cover the container and place the mixture in a warm place for four to eight hours. The full eight hours will give you a tarter product that’s slightly thicker.
Place the warm yogurt in the fridge or in a bowl of cold water to chill. Then refrigerate until completely cold, usually at least four to six hours. The yogurt will thicken more as it cools.
To serve, don’t pre-stir—scoop from the top. The yogurt will keep in the fridge for several weeks, but if you want to use it to start the next batch, you should do so within a few days.
Want It Thicker?
I grew up helping my mom make drained yogurt and eating a lot of it. If you like it thick, like labneh or Greek yogurt, then all you need to do is pour your warm or chilled yogurt into a cloth-lined colander and let it drip.
The cloth should be thin but not too porous. A square cut from an old sheet or pillowcase works great, or you can buy nice cheesecloth online. Place the fabric over a stainless or plastic colander, don’t use aluminum with yogurt; pour some boiling water over the cloth and colander to sanitize it; pour in your fresh yogurt, and cover and stir every hour for two to four hours. When done, whisk or stir it until smooth and refrigerate. Remember, it will thicken even more when it is chilled. Drained yogurt is lower in lactose since most of the remaining milk sugar will flow off with the whey.
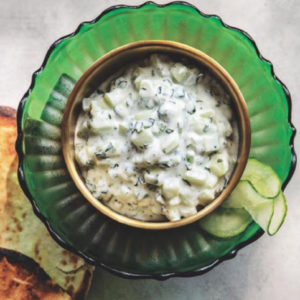
Photo: Carmen Troesser
Tzatziki
This Greek classic has been introduced to most Americans through the gyro sandwich. Homemade tzatziki is great on roast beef sandwiches, day-after-Thanksgiving turkey sandwiches, portobello burgers, and, of course, lamb and beef gyros! My first Greek recipes came from my mom’s cookbook, published in 1950, called Can the Greeks Cook! It’s still a great resource, and you can find used copies online.
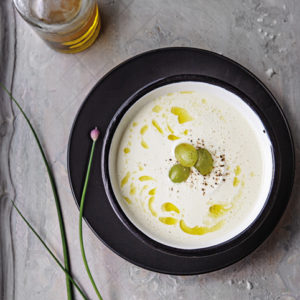
Gazpacho Blanco
I first tasted this amazing Spanish classic more than 20 years ago at the incredible tapas restaurant Jaleo in D.C. We were on our way to see a Shakespeare play at the historic Folger Theatre, and I can’t remember what play we saw, but I never forgot the soup. I found a copy of the recipe and have been making it ever since.
 Bread is a major ingredient in most traditional gazpachos, but I find that yogurt easily adds a similar body and mouthfeel. Of all the gazpachos I have tried, this one is the most distinct, surprising, and satisfying. It’s hearty enough to be the main course for a dinner party and refreshing and enticing enough to serve in a tiny cup as an amuse-bouche before almost any meal. I’ve even served it at Thanksgiving to great accolades.